Mastering Camera Basics: The Exposure Triangle Explained (Plus Frame Rates) 🎥
9/16/24 #2
By the time you're done with this blog post, you’ll have a solid foundation to understand how camera settings work together to get that perfect exposure for your photos or videos. So, grab your camera, set it to manual mode, and let’s dive into the Exposure Triangle—three key settings: shutter speed, aperture, and ISO!
Frames Per Second (FPS): The Basics of Frame Rates
Before we get into the Exposure Triangle, you need to know about frames per second (FPS). FPS refers to the number of individual frames captured by your camera in one second of video. The higher the FPS, the smoother your video will look, while lower FPS can eliminate that smoothness, making it essentially choppier (it could get to the point where it looks like your footage is lagging lol). Here are some of the most common frame rates that you’ll see:
24 FPS: The standard for films. This frame rate gives you that traditional "cinematic" look, which is why it’s commonly used in movies.
30 FPS: This is typically used for television and online videos. It gives a smoother appearance. This is what I use typically for my YouTube videos.
60 FPS (or higher): High frame rates like this are used for capturing super smooth action or are meant for slow-motion effects. You’ll often see this in sports or any high-speed shots.
Remember that different cameras may have different numbers. Instead of 24 fps, some cameras may have 23.976 fps and so forth.
Shutter Speed: Capturing Movement
Shutter speed controls how long your camera’s sensor is exposed to light. It’s literally a combination of two things: the shutter (the part that opens and closes) and the speed (how fast it opens and closes).
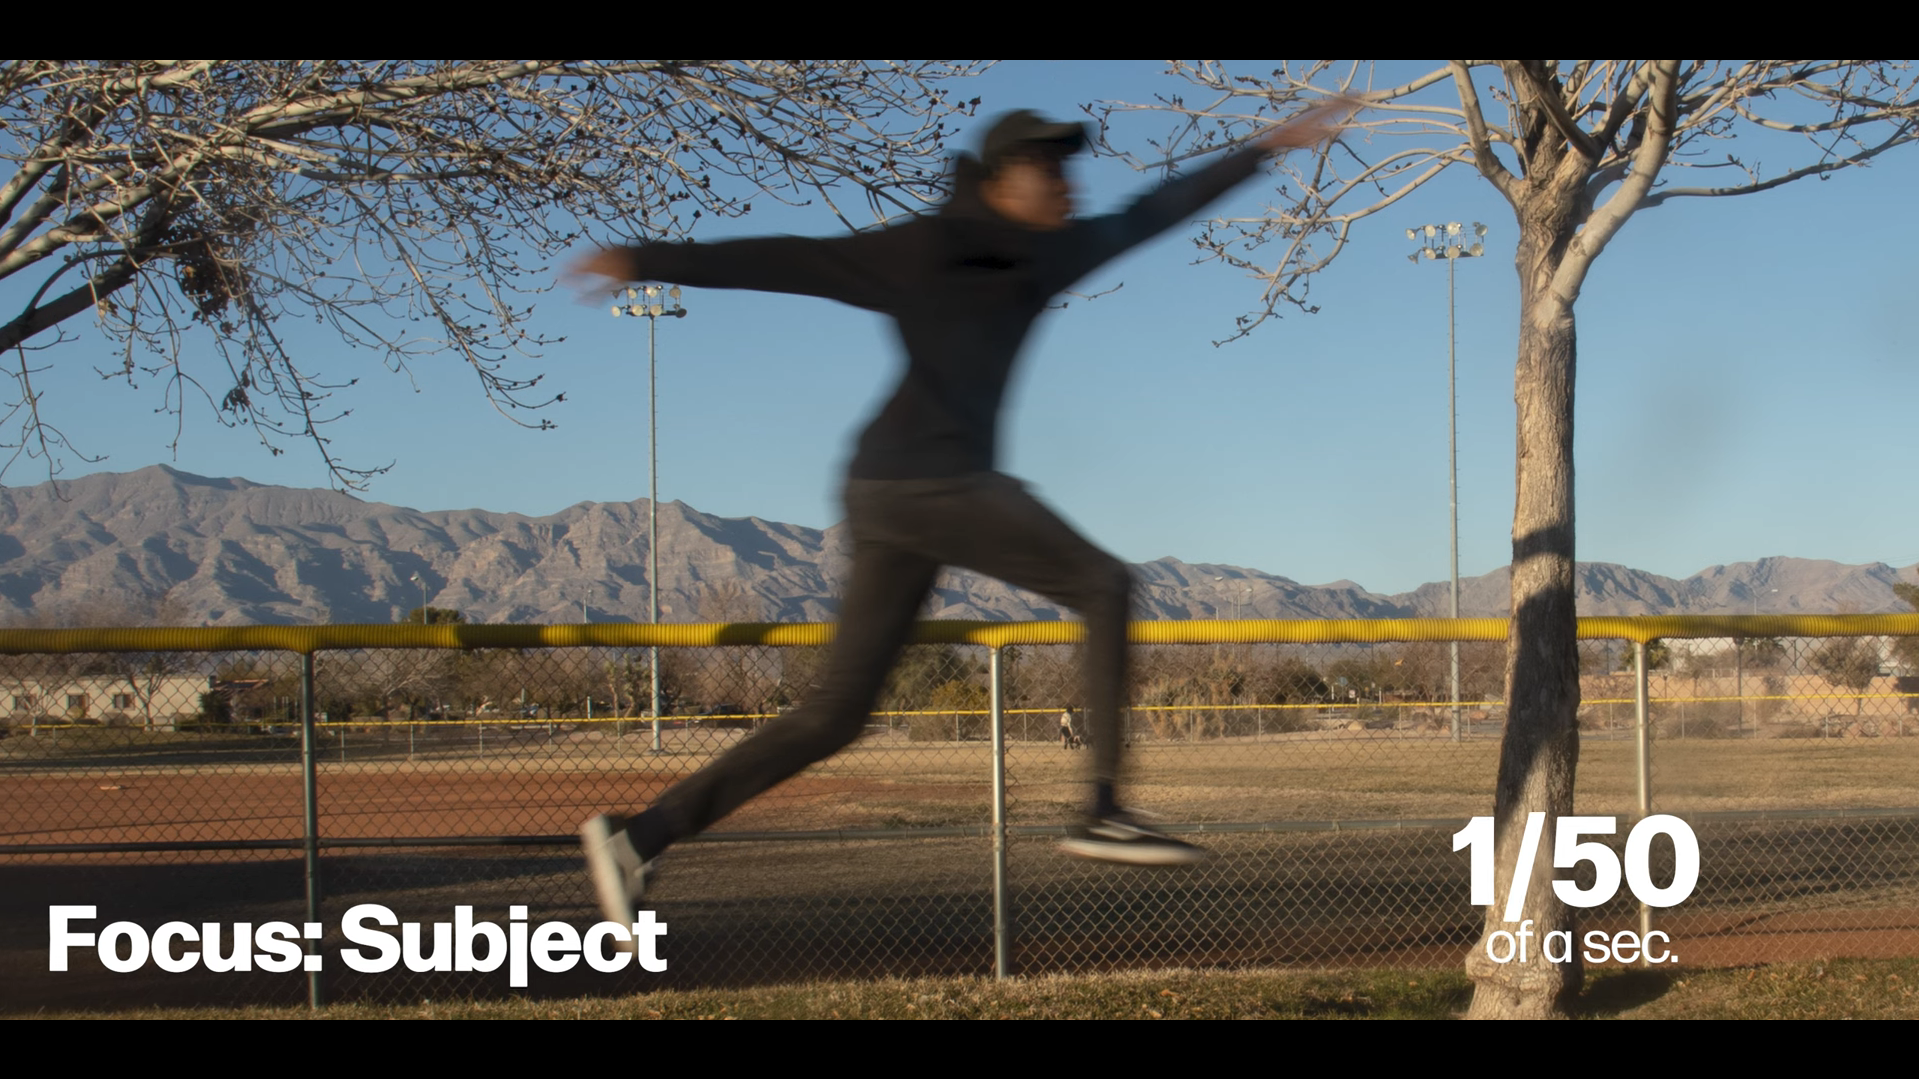
Fast Shutter Speed (e.g., 1/400): If you want to freeze action and avoid motion blur, go for a faster shutter speed. It’s perfect for sports, wildlife, or anything that moves quickly.
Slow Shutter Speed (e.g., 1/15): Slower shutter speeds create a bit of motion blur, which can be awesome for artistic shots like light trails or flowing water.
Basically, the faster the speed, the sharper your image will be, but less light will enter. Conversely, slower speeds let in more light but introduce motion blur.
One key thing to remember is the “180 degree rule” (“180 degrees” coming from global shutter; more prevalent on cinema cameras) where your shutter speed should always be at least double your frame rate for the best motion blur effect. For example, if you’re shooting at 24 FPS, your shutter speed should be around 1/50. Now, with FPS under your belt, let’s get into the Exposure Triangle.
Aperture: Controlling Depth of Field
Aperture refers to the size of the opening in your camera lens, which controls how much light gets in and how much of your shot is in focus.
Wide Aperture (ex. f/1.4, f/1.8, f2.8): A wider aperture means a larger opening in your lens, letting in more light. This is great for portraits or any shot where you want the background blurred and the subject in sharp focus. Think of it as that beautiful "bokeh" effect. “Bokeh” refers to the out-of-focus parts of an image.
Narrow Aperture (f/14, f/16, f/20): A smaller aperture lets in less light but puts more of your image in focus. This is perfect for landscapes or group shots where you want everything in sharp detail.
Remember, the lower the f-stop, the more blurry the background; the higher the f-stop, the sharper your overall image.
ISO: The Sensitivity of Your Sensor
ISO controls how sensitive your camera’s sensor is to light. Back in the day, different film types had different ISOs, but now we can adjust it on the fly.
Low ISO (e.g., 100): If you’re shooting in bright conditions, use a lower ISO. It helps keep your images clean and free of noise (those pesky little grainy dots).
High ISO (e.g., 3200): In darker environments, raising your ISO can help brighten up your image. But be careful—cranking the ISO too high can introduce noise, making your image look grainy.


